How to install and use Kidlogger for Windows
- Open the Control Panel, Update & Security, Windows Security, Virus & Threat Protection. Virus & Threat Protection Settings, Manage Settings, Add or remove exclusions.
- Add the Downloads and C:\Program Files (x86) folders to the list of exclusions.
- Download the KidLogger monitoring agent from the Download page of the site.
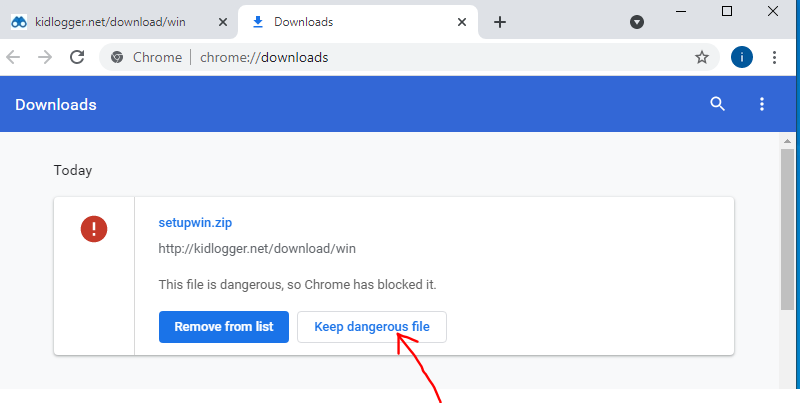
- If Google Chrome does not allow you to download this file, open the Menu, Downloads, and click "Keep dangerous file".
- Unzip the package into a new folder. Right-click the package and select the "Extract all…" command.
- Run install.exe as an administrator (right-click → Run as administrator).
- After installation, the monitoring agent will launch automatically. If it doesn't, run the KidLogger.exe file as an administrator from the Program Files/KidLogger folder.
- Click the Connect to server button in the program's main window.
- Open the KidLogger.net tab.
- In the field Enter your email or device ID, enter the email address you used for registration. Click Connect to account.
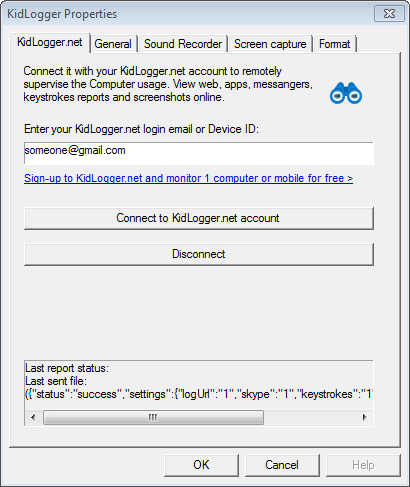
- Note: To connect the KidLogger application to an existing virtual device, insert its device ID into the field. Click Connect to account.
- Return to the KidLogger main window, click Start logging.
- Now monitoring of the target computer begins.
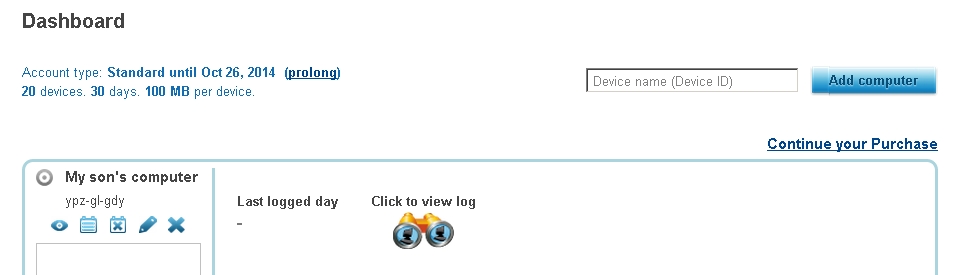
- Log back into your KidLogger.net account and view the data. If you want to rename the device, click the pencil icon.
- Open the KidLogger working folder (by default C:\Program Files (x86)\KidLogger).
- Launch the kidlogger.exe file.
- Click "View current log".
- Click "Open log folder" to see screenshots for each day.
Log files are separated by date. They can be HTML files, mp3 files, or screenshots. KidLogger creates a separate folder for log files of each user account. This logger presents logs in a user-friendly format – HTML files.
- Find the KidLogger working folder on the target computer. Usually, it is C:\Program Files(x86)\KidLogger.
- Run the uninstall.exe (unins000.exe) file as an administrator (right-click → Run as administrator).